03. Commons-FileUpload 를 이용한 파일 업로드
파일 업로드 패키지인 Commons-FileUpload 는 서버의 메모리상에서 파일 처리가 가능하도록 지원한다. 이 패키지는 Commons-io 패키지를 바탕으로 작성되었기 때문에 웹 브라우저에서 서버로 파일을 업로드하기 위해 오픈 라이브러리 commons-fileupload.jar.commons-io.jar 파일을 다음 배포 사이트에서 직접 다운로드 해서 사요ㅗㅇ한다. 그리고 jsp 페이지에 page 디렉티브 태그의 import 속성을 사용하여 패키지 org.apache.commons.fileupload.* 를 설정해야 한다.
- 배포 사이트 : http://commons.apache.org/downloads/
- 다운로드 파일:commons-fileupload-1.3.3-bin.zip,commons-io-2.6-bin.zi
아래 링크 누루면 파일 다운로드 페이지로 바로 간다. 잘 찾아보면 보인다.

https://archive.apache.org/dist/commons/io/binaries/
Index of /dist/commons/io/binaries
archive.apache.org
NOTE_ 오픈 라이브러리 Commons-FileUpload.jar, commons-io.jar 설치 방법
- 배포 사이트에서 commons-fileupload-1.3.3-bin.zip 와 commons-io-2.6-bin.zip 파일을 다운로드 한다.
- 다운로드한 두 파일의 압축을 푼다.
- 압축을 푼 두 파일의 commons-fileupload-1.3.3-bin,commons-io-2.6-bin 폴더에 있는 commons-fileupload-1.3.2.jar,commons-io-2.6.kar 파일을 찾는다.
- 웹 애플리케이션의 /WebContent/WEB-INF/lib 폴더에 commons-fileupload-1.3.2.jar, commons-io-2.6.kar 파일을 포함한다. 또는 서버 톰캣의 /common/lib 폴더와 자바 JDK lib 폴더에 commons-fileupload-1.3.2.jar,commons-io-2.6.kar 파일을 포함한다.
<%@ page contentType="text/html; charset=utf-8" %>
<%@ page import="com.oreilly.servlet.*" %>
<%@ page import="com.oreilly.servlet.multipart.*" %>
<%@ page import="java.util.*" %>
<%@ page import="java.io.*" %>

<html>
<head>
<title>File Upload</title>
</head>
<body>


	<%
		String fileUploadPath = "C:\\upload";

        //Commons-FileUpload 를 이용하여 파일을 업로드 하려면 먼저
        //Commons-FileUpload 패키지에 포함되어있는 DiskFileUpload 객체를 생성한다
        DiskFileUpload upload = new DiskFileUpload();

        //생성된 객체를 통해 DiskFileUpload 클래스가 제공하는 메소드를 사용하여
        //웹 브라우저가 전송한 multipart/form-data 유형의 요청 파라미터를 가져온다.
        List items = upload.parseRequest(request);

        Iterator params = items.iterator();

        while(params.hasNext()){

            //FileItem클래스의 메소드를 사용하여 요청 파라미터가 일반 데이터인지
            //파일인지 분석 및 처리하여 파일을 업로드 한다.
            FileItem item = (FileItem)params.next();
            if(item.isFormField()){
                String title = item.getString("UTF-8");
                out.println("<h3>" + title + "</h3>");
            }else{
                String fileName = item.getName();
                fileName = fileName.substring(fileName.lastIndexOf("\\")+1);
                File file = new File(fileUploadPath + "/" + fileName);
                item.write(file);
                out.println("파일 이름 : " + fileName+ "<br>");
            }
      	}
	%>

</body>
</html>
DiskFileUpload 클래스의 메소드
| 메소드 | 유형 | 설명 |
| setRepositoryPath(String repositoryPath) | void | 업로드된 파일을 임시로 저장할 디렉터리를 설정한다. |
| setSizeMax(long sizeMax) | void | 최대파일의 크기를 설정한다 |
| setSizeThreshold(int sizeThreshold) | void | 메모리상에 저장할 최대 크기를 설정한다 |
| parseRequest(HttpServietRequest req) | List<FileItem> | multipart/form-data 유형의 요청 파라미터를 가져온다 |
FileItem 클래스의 메소드
| 메소드 | 유형 | 설명 |
| isFormFeld() | boolean | 요청 파라미터가 파일이 아니라 인반 데이터인 경우 true를 반환한다 |
| getFieldName() | String | 요청 파라미터의 이름을 얻어온다 |
| getString() | String | 기본 문자 인코딩을 사용하여 요청 파라미터의 값을 얻어온다 |
| getString(String encoding) | String | 설정한 문자 인코딩을 사용하여 요청 파라미터의 값을 얻어온다 |
| getName() | String | 업로드된 파일(경로포함)의 이름을 얻어온다 |
| getSize() | long | 업로드된 파일의 크기를 얻어온다 |
| get() | byte[] | 업로드된 파일을 바이트 배열로 얻어온다 |
| insInMermory() | boolean | 업로드된 파일이 메모리에 저장된 상태인 경우 true를 반환하고 임시 디렉터리에 저장된 경우 false를 반환한다 |
| delete() | void | 파일과 관련된 자원을 삭제한다. 메모리상에 저장된 경우 할당된 메모리를 반환하고, 임시파일로 저장된 경우 파일을 삭제한다 |
| write() | void | 파일과 관련된 자원을 저장한다 |
| getContentType() | String | 웹 브라우저가 전송하는 콘텐츠 유형을 반환하고, 정의되어 있지 않은 경우 null을 반환한다 |
NOTE_ FIleItem 클래스로 업로드 파일을 저장하는 방법
- write()메소드를 사용한다
- getInputStream()메소드로 입력 스트림으로부터 바이트 데이터를 가져와 FileOutputStream()을 사용하여 파일에 출력한다.
- get()메소드로 가져온 바이트 배열을 FileOutputStram을 사용하여 파일에 출력한다.
Srite()메소드는 주로 로컬 디스크에 직접 업로드한 파일을 저장할 때 사용하고, getInputStram()이나 get()메소드는 업로드한 파일에 특별한 처리를 하거나 데이터베이스와 같이 디스크가 아닌 영역에 업로드한 파일을 저장할 때 사용한다.
*FileItem클래스의 메소드 참고 사이트 : https://commons.apache.org/proper/commons-fileupload/apidocs/org/apache/commons/fileupload/FileItem.html
FileItem (Apache Commons FileUpload 1.5 API)
A convenience method to write an uploaded item to disk. The client code is not concerned with whether or not the item is stored in memory, or on disk in a temporary location. They just want to write the uploaded item to a file. This method is not guarantee
commons.apache.org
=Commons-FileUpload 를 이용하여 파일 업로드 하기=
/ch07/fileupload03.jsp
<%@ page contentType="text/html; charset=utf-8" %>
<html>
<head>
<title>File Upload</title>
</head>
<body>

    <!-- 파일 업로드를 위해 폼 태그에 속성 값을 작성 -->
	<form action="fileupload03_process.jsp" method="post" enctype="multipart/form-data">
		<p>파일 : <input type="file" name="filename">
		<p> <input type="submit" value="파일 올리기">
	</form>
</body>
</html>
/ch07/fileupload03_process.jsp
<%@ page contentType="text/html; charset=utf-8" %>

<!-- commons-FileUpload 패키지를 사용하기위해 import해줌 -->
<%@ page import="org.apache.commons.fileupload.*" %>
<%@ page import="java.util.*" %>
<%@ page import="java.io.*" %>

<html>
<head>
<title>File Upload</title>
</head>
<body>
	<%
		//폼페이지에서 전송된 파일을 저장할 서버의 경로를 작성해줌.
		String fileUploadPath = "C:\\upload";

		//파일 업로드를 위해 DistFileUpload 클래스를 생성
		DiskFileUpload upload = new DiskFileUpload();

		//폼페이지에서 전송된 요청 파라미터를 전달받도록 DistFileupload 객체 타입의 parseRequest()메소드를 작성.
		List items = upload.parseRequest(request);

		//폼페이지에서 전송된 요청 파라미터를 Iterator 클래스로 변환
		Iterator params = items.iterator();

		//폼페이제서 전송된 요청 파라미터가 없을 때까지 반복하도록 Iterator 객체 타입의 hasNext()메소드를 작성
		while(params.hasNext()){
			//폼페이지에서 전송된 요청 파라미터의 이름을 가져오도록 Iterator 객체 타입의 next()메소드를 작성
			FileItem fileItem = (FileItem)params.next();

			//폼페이지에서 전송된 요청 파라미터가 파일이면 서버의 파일 저장 경로에 업로드 파일을 저장하도록 작성.
			if(!fileItem.isFormField()){
				String fileName = fileItem.getName();
				fileName = fileName.substring(fileName.lastIndexOf("\\")+1);
				File file = new File(fileUploadPath + "/" + fileName);
				fileItem.write(file);
			}
		}

	%>
</body>
</html>

=Commons-FileUpload를 이용하여 파일 업로드 및 정보 출력하기=
/ch07/fileupload04.jsp
<%@ page contentType="text/html; charset=utf-8" %>
<html>
<head>
<title>File Upload</title>
</head>
<body>n

    <!-- 파일 업로드를 위해 폼 태그에 속성 값을 작성 -->
	<form action="fileupload03_process.jsp" method="post" enctype="multipart/form-data">
		<p>이름 : <input type="text" name="name">
		<p>제목 : <input type="text" name="subject">
		<p>파일 : <input type="file" name="filename">
		<p> <input type="submit" value="파일 올리기">
	</form>
</body>
</html>
/ch07/fileupload04_process.jsp
<%@ page contentType="text/html; charset=utf-8" %>
<%@ page import="org.apache.commons.fileupload.*" %>
<%@ page import="java.util.*" %>
<%@ page import="java.io.*" %>

<html>
<head>
<title>File Upload</title>
</head>
<body>
	<%
		String path = "C:\\upload";

		//파일 업로드를 위해 DistFileUpload 클래스를 생성
		DiskFileUpload upload = new DiskFileUpload();


		//업로드할 파일의 초대 크기, 메모리상에 저장할 최대 크기, 업로드된 파일을 임시로 저장할 경로를 작성
		upload.setSizeMax(1000000);
		upload.setSizeThreshold(4096);
		upload.setRepositoryPath(path);

		//폼페이지에서 전송된 요청 파라미터를 전달받도록 DistFileupload 객체 타입의 parseRequest()메소드를 작성.
		List items = upload.parseRequest(request);

		//폼페이지에서 전송된 요청 파라미터를 Iterator 클래스로 변환
		Iterator params = items.iterator();

		//폼페이제서 전송된 요청 파라미터가 없을 때까지 반복하도록 Iterator 객체 타입의 hasNext()메소드를 작성
		while(params.hasNext()){
			//폼페이지에서 전송된 요청 파라미터의 이름을 가져오도록 Iterator 객체 타입의 next()메소드를 작성
			FileItem item = (FileItem)params.next();

			//폼페이지에서 정송된 요청 파라미터가 일반 데이터면 요청 파라미터의 이름과 값을 출력하도록 out 내장객체의 println()메소드를 작성
			if(item.isFormField()){
				String name = item.getFieldName();
				String value = item.getString("utf-8");
				out.println(name + "=" + value + "<br>");
			}else{
				String fileFieldName = item.getFieldName();
				String fileName = item.getName();
				String contentType = item.getContentType();

				fileName = fileName.substring(fileName.lastIndexOf("\\")+1);
				long fileSize = item.getSize();

				File file = new File(path + "/" + fileName);
				item.write(file);

				out.println("__________________<br>");
				out.println("요청 파라미터 이름 : " +fileFieldName + "<br>");
				out.println("저장 파일 이름 :"+ fileName+"<br>");
				out.println("파일 콘텐츠 유형 : " +contentType+"<br>");
				out.println("파일 크기 : " + fileSize);
			}
		}

	%>
</body>
</html>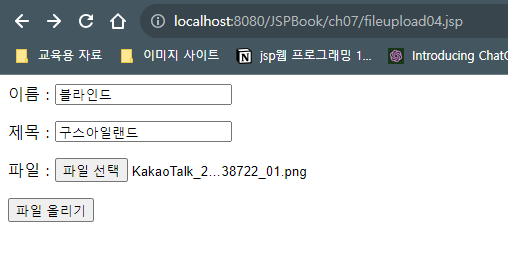

04. 쇼핑몰 - 상품 이미지 등록하기
파일 업로드 처리방법을 이용하여 상품 이미지를 등록할 수 있는 폼페이지를 만들고 상품 이미지를 업로드하여 상품 이미지를 출력한다.
=정적 리소스(상품 이미지 및 부트스트랩 CSS)관리하기=
1.상품 클래스에 멤버 변수 추가하기 : 상품 이미지를 저장 및 관리하기 위해 Product 클래스에 다음과 같이 필드를 선언한다.
2.추가된 멤버 변수의 Setter/Getter() 메소드 작성하기 : 추가된 멤버 변수 filename 의 Setter/Getter()메소드를 각각 추가한다.
package dto;

import java.io.Serializable;

public class Product implements Serializable {


	//멤버 변수 filename의 Setter/Getter()메소드 추가
	public String getFilename() {
		return filename;
	}

	public void setFilename(String filename) {
		this.filename = filename;
	}

	private static final long serialVersionUID = -4274700572038677000L;

	private String productId; //상품 아이디
	private String pname; //상품명
	private Integer unitPrice; //상품가격
	private String description; //상품 설명
	private String manufacturer; // 제조사
	private String category; //분류
	private long unitsInStock; //제고 수
	private String condition; //신상품 or 중고품 or 재생품
	private String filename;   //이미지 파일명

	public Product() {
		super();
		// TODO Auto-generated constructor stub
	}

	public Product(String productId, String pname, Integer unitPrice) {

		this.productId = productId;
		this.pname = pname;
		this.unitPrice = unitPrice;


	}

	public String getProductId() {
		return productId;
	}

	public void setProductId(String productId) {
		this.productId = productId;
	}

	public String getPname() {
		return pname;
	}

	public void setPname(String pname) {
		this.pname = pname;
	}

	public Integer getUnitPrice() {
		return unitPrice;
	}

	public void setUnitPrice(Integer unitPrice) {
		this.unitPrice = unitPrice;
	}

	public String getDescription() {
		return description;
	}

	public void setDescription(String description) {
		this.description = description;
	}

	public String getManufacturer() {
		return manufacturer;
	}

	public void setManufacturer(String manufacturer) {
		this.manufacturer = manufacturer;
	}

	public String getCategory() {
		return category;
	}

	public void setCategory(String category) {
		this.category = category;
	}

	public long getUnitsInStock() {
		return unitsInStock;
	}

	public void setUnitsInStock(long unitsInStock) {
		this.unitsInStock = unitsInStock;
	}

	public String getCondition() {
		return condition;
	}

	public void setCondition(String condition) {
		this.condition = condition;
	}


}
3. 상품 데이터 접근 클래스 수정하기 : ProductRepository 클래스의 기본 생성자에 상품 이미지를 설정하도록 다음과 같이 추가작성한다.
package dao;

import java.util.ArrayList;

import dto.Product;
public class ProductRepository {

	private ArrayList<Product> listOfProducts = new ArrayList<Product>();
	private static ProductRepository instance = new ProductRepository(); //ProductRepository 클래스의 기본 생성자에 대한 객체 변수 instance를 작성한다.

	public static ProductRepository getInstance() { //객체 변수 instance 에 대한 Getter()메소드를 작성한다.
		return instance;
	}

	public ProductRepository() {
		Product phone = new Product("P1234","iPhone 6s", 800000);
		phone.setDescription("4.7-inch, 1334X750 Renina HD display, 8-megapixel iSight Camera");
		phone.setCategory("Smart Phone");
		phone.setManufacturer("Apple");
		phone.setUnitsInStock(1000);
		phone.setCondition("New");
		phone.setFilename("P1234.png");

		Product notebook = new Product("P1235","LG PC 그램",150000);
		notebook.setDescription("13.3-inch, IPS LED display , 5rd Generation Intel Core processors");
		notebook.setCategory("Notebook");
		notebook.setManufacturer("LG");
		notebook.setUnitsInStock(1000);
		notebook.setCondition("Refurbishe");
		notebook.setFilename("P1235.png");


		Product tablet = new Product("P1236", "Galaxy Tab S", 900000);
		tablet.setDescription("212.8*125.6*6.6mm, Super AMOLED display, Octa-Core processor");
		tablet.setCategory("Tablet");
		tablet.setManufacturer("Samsung");
		tablet.setUnitsInStock(1000);
		tablet.setCondition("Old");
		tablet.setFilename("P1236.png");

		listOfProducts.add(phone);
		listOfProducts.add(notebook);
		listOfProducts.add(tablet);


	}

	public ArrayList<Product>getAllProducts(){
		return listOfProducts;
	}

	//상품 상세 정보 표시하기 chapter05
	public Product getProductById(String productId) {
		Product productById = null;

		for(int i=0; i<listOfProducts.size(); i++) {

			Product product = listOfProducts.get(i);
			if(product != null && product.getProductId() != null && product.getProductId().equals(productId)){

					productById = product;
					break;
			}
		} //객체 변수 listOfProducts 에 저장된 모든 상품 목록에서 상품 아이디와 일치하는 상품을 가져오는 getProductById()메소드를 작성
		return productById;
	}

	public void addProduct(Product product) { //객체변수 listOfProducts 에 새로운 상품 정보를 등록하는 addProduct()메소드를 작성 한다.
		listOfProducts.add(product);
	}
}
4. 정적 리소스 관리 폴더 만들기: /WebContent/폴더에 resources 폴더를 생성하고, 여기에 이미지파일을 관리하는 images 폴더와 부트스트랩 파일( bootstrap.min.css)을 관리하는 css폴더를 생성한다.
- 생성된 image 폴더에 이미지 파일명을 상품 아이디로 하여 등록한다.
- css폴더에 부트스트램 css 파일(bootstrap.min.css)을 다운로드 하여 등록한다.
5.상품 목록 페이지 수정하기 : products.jsp 파일에 부트스트랩 css를 포함하고 상품 이미지를 출력하기 위해 다음과 같이 수정한다. (이미지 태그에 alt 는 웹접근성을 위하여 꼭 입력하였으면 하는 바램이다 ㅜㅜ, 책에는 나와있지 않음..)
<%@ page contentType="text/html; charset=utf-8"%>
<%@ page import="java.util.ArrayList"%>
<%@ page import="dto.Product" %>
<%@ page import="dao.ProductRepository" %>
<jsp:useBean id="productDAO" class="dao.ProductRepository" scope="session" />
<html>
<head>
<link rel="stylesheet" href="./resources/css/bootstrap.mis.css">
<title>상품목록</title>
</head>
<body>
<jsp:include page="menu.jsp"/>
<div class="jumbotron">
<div class="container">
<h1 class="display-3">상품 목록</h1>
</div>
</div>
<%
//ProductRepository 클래스의 객체변수 instance를 호출하는 getInstance()메소드를 작성한다.
//이를통해 getAllProducts()메소드를 호출하여 반환 결과 값을 ArrayList<Product>객체타입의 변수 listOfProducts에 저장한다.
ProductRepository dao = ProductRepository.getInstance();
ArrayList<Product> listOfProducts = dao.getAllProducts();
//ArrayList<Product> listOfProducts = productDAO.getAllProducts();
%>
<div class="container">
<div class="row" align="center">
<%
for(int i = 0; i<listOfProducts.size();i++){
Product product = listOfProducts.get(i);
%>
<div class="col-md-4">
<img alt="상품이미지" src="./resources/images/<%=product.getFilename()%>" style="width:100%"> <!-- html 태그에 바로 style 준거 너무 거슬리긴 한데 jsp 공부중이니 넘어가도록 하자..-->
<h3><%= product.getPname() %></h3>
<p><%= product.getDescription() %></p>
<p><%= product.getUnitPrice() %>원</p>
<p><a href="./product.jsp?id=<%=product.getProductId() %>"class = "btn btn-secondary" role="button"> 상세 정보 »</a>
<!-- 상품 아이디에 대한 상세 정보 페이지가 연결되도록 <상세정보>버튼을 작성 -->
</div>
<%
}
%>
</div>
<hr>
</div>
<jsp:include page="footer.jsp"/>
</body>
</html>6. 상품 상세 정보 페이지 수정하기 : product.jsp 파일에 부트스랩 css 를 포함하고 상품 이미지를 출력하기 위해 다음과 같이 수정한 후 웹 브라우저에서 확인해보자
<%@ page contentType="text/html; charset=utf-8"%>
<!-- 생성한 상품 클래스 dto.Product 패키기를 사용하기 위해 page 디렉티브 태그 import -->
<%@ page import="dto.Product" %>
<!-- 기존에 작성된 useBean액션태그를 없애고 상품접근 클래스 dao.ProductRepository 패키지를 사용하기위해 page디렉티브 태그의 import속성을 작성 -->
<%@ page import="dao.ProductRepository" %>
<!-- 자바빈즈로 생성한 ProductRepository 클래스를 사용하도록 useBean 액션 태그를 작성한다 -->
<!-- jsp:useBean id="productDAO" class="dao.ProductRepository" scope="session" /-->
<html>
<head>
<link rel="stylesheet" href="./resources/css/bootstrap.min.css">
<title>상품 상세 정보</title>
</head>
<body>
<jsp:include page="menu.jsp"/>
<div class="jumbotron">
<div class="container">
<h1 class="display-3">상품 정보</h1>
</div>
</div>
<%
String id = request.getParameter("id"); //상품 목록 페이지로부터 전달되는 상품 아이디를 전송받도록 request내장 객체의 getParameter()메소드를 작성
//ProductRepository클래스의 객체 변수 instance를 호출하는 getInstance()메소드를 작성한다.
//이를통해getProductById()메소드를 호출하여 반환 결과 값을 Product 객체 타입의 변수 product에 저장한다.
ProductRepository dao = ProductRepository.getInstance();
Product product = dao.getProductById(id);
//useBean를 사용했을시에 예제
//Product product = productDAO.getProductById(id);
//useBean 액션 태그에 id 속성 값을 통해 ProductRepository클래스의
//getProductById()메소드를 호출하여 반환된 결과 값을 Product 객체 타입의 변수 Product 에 저장하도록 작성한다.
%>
<div class="container">
<div class="row">
<div class="col-md-5">
<img alt="상품이미지" src="./resources/images/<%=product.getFilename()%>" style="width:100%">
</div>
<div class="col=md-6"> <!-- Product 객체 타입의 변수 product 에 저장된 상품명, 상품 상세 정보, 상품 코드, 제조사, 분류, 재고 수 , 상품 가격 등을
출력하도록 표현문 태그를 작성 -->
<h3><%=product.getPname() %></h3>
<p><%=product.getDescription()%>
<p> <b>상품 코드 : </b><span class="badge badge-danger">
<%=product.getProductId() %></span>
<p> <b>제조사</b> :<%=product.getManufacturer() %>
<p> <b>분류</b> :<%=product.getCategory() %>
<p> <b>재고 수</b> : <%=product.getUnitsInStock() %>
<h4><%=product.getUnitPrice() %></h4>
<!-- <상품주문>,<상품 목록> 버튼을 작성한다 -->
<p> <a href="#" class="btn btn-info">상품 주문 »</a>
<a href="./products.jsp" class="btn btn-secondary"> 상품 목록 »</a>
</div>
</div>
</div>
<jsp:include page="footer.jsp"/>
</body>
</html>

- 상품 이미지 업로드 하기
1. 상품 이미지 파일의 저장 위치 만들기 : C드라이브에 upload 폴더를 생성하고 이 폴더에 상품 이미지파일명을 상품 아이디로 하여 등록한다.
2. 오픈 라이브러리 cos.jar 등록하기 : MultipartRequest 클래스를 이용한 파일 업로드를 위해 /WebContent/WEB-INF/lib 폴더에 cos.jar 파일을 등록한다.
3. 상품 목록 페이지 수정하기 : C:\upload 폴더에 저장된 상품 이미지를 출력하기 위해 다음과 같이 products.jsp 파일을 수정
<div class="col-md-4">
<img alt="상품이미지" src="c:/upload/<%=product.getFilename()%>" style="width:100%">
<h3><%= product.getPname() %></h3>
<p><%= product.getDescription() %></p>
<p><%= product.getUnitPrice() %>원</p>
<p><a href="./product.jsp?id=<%=product.getProductId() %>"class = "btn btn-secondary" role="button"> 상세 정보 »</a>
<!-- 상품 아이디에 대한 상세 정보 페이지가 연결되도록 <상세정보>버튼을 작성 -->
</div>4.상품 상세 정보 페이지 수정하기: C:\upload 폴더에 저장된 상품 이미지를 출력하기 위해 다음과 같이 product.jsp 파일을 수정한다
<div class="row">
<div class="col-md-5">
<img alt="상품이미지" src="c:/upload/<%=product.getFilename()%>" style="width:100%">
</div>
<div class="col=md-6"> <!-- Product 객체 타입의 변수 product 에 저장된 상품명, 상품 상세 정보, 상품 코드, 제조사, 분류, 재고 수 , 상품 가격 등을
출력하도록 표현문 태그를 작성 -->
<h3><%=product.getPname() %></h3>
<p><%=product.getDescription()%>
<p> <b>상품 코드 : </b><span class="badge badge-danger">
<%=product.getProductId() %></span>
<p> <b>제조사</b> :<%=product.getManufacturer() %>
<p> <b>분류</b> :<%=product.getCategory() %>
<p> <b>재고 수</b> : <%=product.getUnitsInStock() %>
<h4><%=product.getUnitPrice() %></h4>
<!-- <상품주문>,<상품 목록> 버튼을 작성한다 -->
<p> <a href="#" class="btn btn-info">상품 주문 »</a>
<a href="./products.jsp" class="btn btn-secondary"> 상품 목록 »</a>
</div>
</div>5. 상품 정보 등록 페이지 수정하기: addProduct.jsp 파일에 부트스트랩 css를 포함하고 상품 이미지를 업로드 하기 위해 다음과 같이 수정.
<%@ page contentType="text/html; charset=utf-8" %>
<html>
<head>
<link rel="stylesheet" href="./resources/css/bootstrap.min.css">
<title>상품 등록</title>
</head>
<body>
	<jsp:include page="menu.jsp"/>
	<div class="jumbotron">
		<div class="container">
			<h1 class="display-3">상품 등록</h1>
		</div>
	</div>
	<div class="container">
		<!-- 파일업로드를 위한 폼 태그에 enctype 속성값을 추가로 작성해준다.  -->
		<form name="newProduct" action="./processAddProduct.jsp" class="form-horizontal" method="post" enctype="multipart/form-data">
			<div class="form-group row">
				<label class="col-sm-2">상품 코드</label>
				<div class="col-sm-3">
					<input type="text" name="productId" class="form-control">
				</div>
			</div>
			<div class="form-group row">
				<label class="col-sm-2">상품명</label>
				<div class="col-sm-3">
					<input type="text" name="name" class="form-control">
				</div>
			</div>
			<div class="form-group row">
				<label class="col-sm-2">가격</label>
				<div class="col-sm-3">
					<input type="text" name="unitPrice" class="form-control">
				</div>
			</div>
			<div class="form-group row">
				<label class="col-sm-2">상세 정보</label>
				<div class="col-sm-3">
					<textarea name="description" cols="50" rows="2" class="form-control"></textarea><!-- 상품 설명값을 여러줄로 입력받도록 textarea 태그를 작성한다 -->
				</div>
			</div>
			<div class="form-group row">
				<label class="col-sm-2">제조사</label>
				<div class="col-sm-3">
					<input type="text" name="manufacturer" class="form-control">
				</div>
			</div>
			<div class="form-group row">
				<label class="col-sm-2">분류</label>
				<div class="col-sm-3">
					<input type="text" name="category" class="form-control">
				</div>
			</div>
			<div class="form-group row">
				<label class="col-sm-2">재고 수</label>
				<div class="col-sm-3">
					<input type="text" name="unitInStock" class="form-control">
				</div>
			</div>
			<div class="form-group row">
				<label class="col-sm-2">상태</label> <!-- 상품 상태값중 하나만 선택 입력받도록 radio로 작성 -->
				<div class="col-sm-5">
					<input type="radio" name="condition" value="New"> 신규 제품
					<input type="radio" name="condition" value="Ole"> 중고 제품
					<input type="radio" name="condition" value="Refurbished"> 재생 제품
				</div>
			</div>

			<!-- 파일을 입력받도록 input 태그의 type 속성값을 file로 작성, name 속성을 작성한다.  -->
			<div class="form-group row">
				<label class="col-sm-2">이미지</label>
				<div class="col-sm-5">
					<input type="file" name="productImage" class="form-control">
				</div>
			</div>
			<div class="form-group row">
				<div class="col-sm-offset-2 col-sm-10">
					<input type="submit" class="btn btn-primary" value="등록"> <!-- 입력된 데이터를 서버로 전송하도록 input 태그의 type 속성값을 submit로 작성 -->
				</div>
			</div>
		</form>
	</div>
</body>
</html>
6. 상품 등록 처리 페이지 수정하기 : processAddproduct.jsp 파일에 상품 이미지 파일을 업로드 하기 위해 다음과 같이 수정
<%@ page contentType="text/html; charset=utf-8" %>
<%@ page import="com.oreilly.servlet.*" %>
<%@ page import="com.oreilly.servlet.multipart.*" %>
<%@ page import="java.util.*" %>
<%@ page import="dto.Product" %>
<%@ page import="dao.ProductRepository" %>

<%
	request.setCharacterEncoding("utf-8"); //한글 깨지지 않기 위해서 인코딩유형을 설정한다.


	//서버 파일의 저장 경로와 최대 파일  크기 파일명의 인코딩 유형.
	String filename = "";
	String realFolder = "C:\\upload"; //웹 애플리케이션상의 절대 경로
	int maxSize = 5 * 1024 * 1024; //최대 업로드될 파일의 크기 5MB
	String encType = "utf-8"; //인코딩 유형

	//MultipartRequest 객체를 생성하도록 MultipartRequest 생성자를 작성한다. 매개변수로 바로 위행에 설정된 값과 DefaultFileRenamePolicy 클래스를 설정한다.
	MultipartRequest multi = new MultipartRequest(request, realFolder, maxSize, encType, new DefaultFileRenamePolicy());

	//폼 페이지에서 입력된 요청 파라미터 값을 얻어오도록 요청 파라미터의 이름을 설정하여 MultipartRequest 객체타입의 getParameter()메소드를 작성한다.
	String productId = multi.getParameter("productId");
	String name = multi.getParameter("name");
	String unitPrice = multi.getParameter("unitPrice");
	String description = multi.getParameter("description");
	String manufacturer = multi.getParameter("manufacturer");
	String category = multi.getParameter("category");
	String unitsInStock = multi.getParameter("unitInStock");
	String condition = multi.getParameter("condition");

	//폼 페이지에서 상품 가격이 입력 되지 않은 경우 0 으로, 입력된 경우 정수형으로 변경하도록 작성한다.
	Integer price;

	if(unitPrice.isEmpty())
		price = 0;
	else
		price = Integer.valueOf(unitPrice);

	//폼 페이지에서 상품 재고 수가 입력되지 않은 경우 0 으로, 입력된 경우 정수형으로 변경하도록 작성한다.
	long stock = 0;

	if(unitsInStock.isEmpty())
		stock = 0;
	else
		stock = Long.valueOf(unitsInStock);

	//폼 페이지에서 전송된 요청 파라미터 중 파일을 받도록 MultipartRequest 객체타입의 getFileNames()메소드를 작성
	Enumeration files = multi.getFileNames();
	//폼 페이지에서 전송된 요청파라미터 중 파일을 받도록 Enumeration 객체 타입의 nextElement()메소드를 작성.
	String fname = (String)files.nextElement();
	//폼페이지에서 전송되어 서버에 업로드된 파일을 가져오도록 MultipartRequest 객체 타입의 getFilesystemName()메소드를작성.
	String fileName = multi.getFilesystemName(fname);


	ProductRepository dao = ProductRepository.getInstance();

	Product newProduct = new Product();
	newProduct.setProductId(productId);
	newProduct.setPname(name);
	newProduct.setUnitPrice(price);
	newProduct.setDescription(description);
	newProduct.setManufacturer(manufacturer);
	newProduct.setCategory(category);
	newProduct.setUnitsInStock(stock);
	newProduct.setCondition(condition);
	newProduct.setFilename(fileName);

	dao.addProduct(newProduct); //폼 페이지에서 입력된 데이터를 저장하도록 ProductRepository 클래스의 addProduct()메소드를 호출한다.

	response.sendRedirect("products.jsp"); //products.jsp ㅍ이지로 강제 이동하도록 response 내장 객체의 sendRedirect()메소드를 작성.

%>
요약
01. 파일 업로드의 개요
- 파일 업로드는 웹 브라우저에서 서버로 파일을 전송하여 서버에 저장하는 것을 말한다. 웹 브라우저에서 서버로 파일을 전송하기 위해 jsp 페이지에 폼 태그를 사용하고, 전송된 파일을 서버에 저장하기 위해 오픈 라이브러리를 이용해야 한다.
02. MultipartRequest 를 이용한 파일 업로드
- MultipartRequest 클래스를 이용하여 파일을 업로드하려면 먼저 MultipartRequest객체를 생성한다. 그리고 생성된 객체를 통해 MultipartRequest 클래스가 제공하는 메소드를 사용하여 웹 브라우저가 전송한 multipart/form-data 유형의 요청 파라미터를 읽어오고 파일을 업로드 한다.
03. Commons-FileUpload를 이용한 파일 업로드
- Commons-FileUpload를이용하여 파일을 업로드 하려면 먼저 Commons-FileUpload패키지에 포함되어 있는 DistFileUpload 객체를 생성한다. 생성된 객체를 통해 DistFileUpload 클래스가 제공하는 메소드를 사용하여 웹 브라우저가 전송한 multipart/form-data유형의 요청 파라미터를 가져온다. 그리고 FileItem클래스의 메소드를 사용하여 요청 파라미터가 일반 데이터인지 파일인지 분석 및 처리하여 파일을 업로드 한다.
'JSP, Servlet, MySQL > JSP - webmarket' 카테고리의 다른 글
| 유효성 검사 : 상품 등록 데이터의 유효성 검사하기 2 (0) | 2023.09.09 |
|---|---|
| 유효성 검사 : 상품 등록 데이터의 유효성 검사하기 (0) | 2023.09.08 |
| 파일 업로드 : 상품 이미지 등록하기 /파일업로드 상태 500 내부 서버 오류/Not a directory (0) | 2023.09.05 |
| 폼 태그 : 상품 등록 페이지 만들기 2 (0) | 2023.09.04 |
| 폼 태그 : 상품 등록 페이지 만들기 (3) | 2023.09.03 |


